
DIY Pendant Lighting Projects - Personalize Your Space with Custom Designs
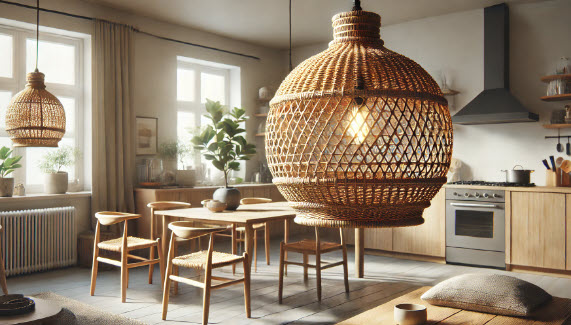
Creating your own pendant lighting is a fantastic way to infuse personality into your home while saving some cash. With just a few materials and some creativity, you can design one-of-a-kind pendants that perfectly suit your style. Here are three unique DIY pendant lighting projects, complete with step-by-step instructions, to help you get started.
Rustic Basket Pendant Light
Transform a simple woven basket into a rustic pendant light that adds warmth and texture to any space. This project works well in kitchens, dining rooms, or any cozy corner.
Materials Needed:
- Woven basket (with open weave for light to pass through)
- Light kit (pendant cord with socket)
- Drill with a hole saw bit
- Painter’s tape
- LED bulb
Instructions:
- Prepare the Basket: Flip the basket over and use painter’s tape to mark the center of the bottom.
- Drill a Hole: Using the hole saw bit, drill a hole in the center of the basket’s base. This will be where the pendant cord fits through.
- Attach the Light Kit: Thread the pendant light cord through the hole and secure it according to the light kit instructions.
- Add the Bulb and Hang: Screw in the LED bulb, and hang your new basket pendant! Adjust the cord length to position it at the right height for your space.
Styling Tip: Hang multiple basket pendants at different heights for a layered look above a dining table or kitchen island.
Industrial Mason Jar Pendant Light
Perfect for rustic or industrial-inspired spaces, this Mason jar pendant adds charm and a touch of vintage style.
Materials Needed:
- Mason jar with metal lid
- Light kit with a small socket
- Drill with a metal hole saw bit
- Protective gloves
- LED bulb
Instructions:
- Prepare the Lid: Put on protective gloves and drill a hole in the center of the Mason jar lid, just large enough to fit the light socket.
- Attach the Light Kit: Insert the socket through the lid hole and secure it tightly.
- Assemble the Jar: Screw the lid back onto the Mason jar, making sure the light kit and bulb fit inside without touching the glass walls.
- Add the Bulb and Hang: Insert an LED bulb, then hang your new Mason jar pendant.
Styling Tip: Mason jar pendants work beautifully in clusters. Hang a few in a row above a breakfast bar or staggered in a corner for a cozy glow.
Minimalist Geometric Pendant Light
This simple, modern pendant is made from copper pipes, bringing a sleek, minimalist touch to any room. It’s perfect for Scandinavian or contemporary spaces.
Materials Needed:
- Copper pipes (two 10-inch lengths and two 8-inch lengths)
- Pipe cutter
- Copper connectors
- Light kit with a socket
- LED bulb
Instructions:
- Cut the Pipes: Use the pipe cutter to cut the copper pipes into the required lengths. You’ll need four pieces in total: two longer (10 inches) and two shorter (8 inches).
- Assemble the Frame: Use the copper connectors to join the pipes into a rectangular or square frame, depending on your preferred shape. Ensure the structure is secure.
- Attach the Light Kit: Feed the light kit’s cord through the top connector, letting the socket hang in the center of the frame.
- Add the Bulb and Hang: Screw in the LED bulb, and adjust the cord length to suit your space.
Styling Tip: Copper or brass accents look great against darker walls. Try placing this light over a bedside table or in an entryway to create a modern statement piece.
Enjoy!
With these DIY pendant lighting projects, you can create stylish, custom lighting fixtures that add a personal touch to any room. Experiment with different shapes, materials, and bulb types to create lighting that’s uniquely yours. Not only will you save money, but you’ll have the satisfaction of creating something truly one-of-a-kind!